How to Buy a Domain and Hosting for WordPress (Easy Guide in 2025)
Let’s get real for a second.
If you want to start a blog — a real one — not just a free sub-domain Tumblr or Blogspot with a mood board and an outdated URL, then you need two things:
👉 A domain name
👉 A hosting plan
That’s your blog’s foundation. No domain? No address. No hosting? No house.
So let’s walk through how to buy a domain and hosting for WordPress — without feeling like you’ve walked into a tech support call.
What’s a Domain Name?
Your domain name is your blog’s street address — your “blogname.com.”
This is how people find you online. It’s what they’ll type, see in Google results, and (hopefully) share with friends.
So, yeah — it matters.
A good domain should be:
- Easy to spell
- Short and memorable
- Reflect your niche or vibe
- Ideally end in .com
What Makes a Bad Domain?
You only need to buy a domain once — so make it count.
Here’s what I avoid when choosing a domain:
❌ Bad Domain Examples:
- health-tips-24×7.net – confusing and spammy
- theblogaboutthingsyoumighthate.com – way too long
- style4youz.biz – hard to spell, looks shady
✅ Good Domain Examples:
- mindfulmoments.com
- theplantedit.com
- slowandsteady.net
Don’t overthink it. But don’t wing it either. I usually brainstorm 5–10 names, check availability on Namecheap or directly in Hostinger, and go with the one that feels right and is available.
What is Web Hosting — and Do I Need It
Think of web hosting as the land where your blog lives. Just like you need a plot to build a house, your blog needs a place on the internet to exist — and that’s exactly what hosting provides.
When someone types in your domain name (like yourblog.com), web hosting makes sure all your blog posts, images, and files show up quickly and securely. Without hosting, your website simply wouldn’t be online.
So yes, you definitely need web hosting to run a WordPress blog. But don’t worry — it’s not as complicated (or expensive) as it sounds. Most hosting providers (like Hostinger) offer beginner-friendly plans that come with everything you need to get started, including one-click WordPress installation and even a free domain.
Now that we’ve got that cleared up, let’s talk about picking the right one — because there are hundreds of options, and not all are beginner-friendly.
If you’re just starting out in 2025, keep it simple: go with Hostinger.
Why? Because:
- It’s beginner-friendly
- It comes with a free domain
- One-click WordPress setup
- Free SSL (Secures your blog with HTTPS so visitors know it’s safe)
- It’s super affordable (like, less than coffee-level monthly)
Other Options:
- Bluehost (recommended by WordPress)
- SiteGround (solid support, slightly pricier)
But for most beginners? Hostinger is perfect.
Hostinger Setup: Step-by-Step
Here’s how to actually set it up (2025 version):
Step 1: Go to Hostinger.com
Choose the Premium or Business Shared Hosting plan and select at least a 12-month period — it includes a 30-day money-back guarantee.

Note: It comes with free domain + SSL included. 😉
Step 2: Create Your Account
Email + password. Keep it simple. Note down your username and password
Step 3: Complete the Payment
I skip the extra upsells or add-ons — you can add those later if needed.
Once payment’s done, you’ll land in your hPanel (Hostinger dashboard).

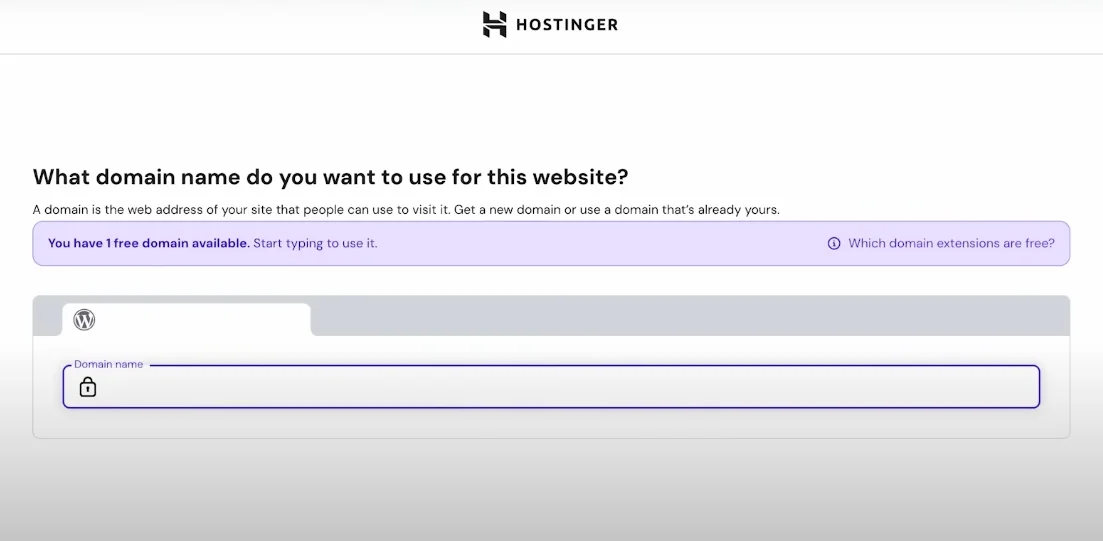
Step 4: Choose Your Domain
Type in your blog name idea. If it’s available, boom — grab it.
If not, tweak slightly. Try .com first, but .co or .net can work too.
After that, click on ‘Install WordPress’. It will take 1 to 3 minutes to install. If you skipped some steps earlier—such as selecting a domain—you can manually install WordPress later by following the steps below. In Hostinger, you can skip domain selection during setup and install WordPress manually through hPanel.
Step 5: Install WordPress
Time to install WordPress — no coding required.
Inside Hostinger hPanel:
- Go to Websites > + Add Website
- Choose Auto Installer > WordPress
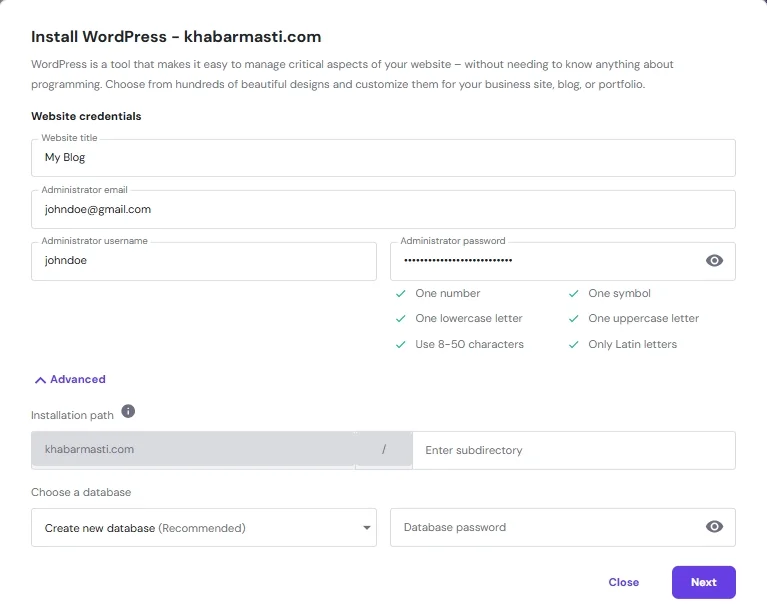
- Fill in:
- Website Title: Your blog’s name
- Admin Email: Something real (for password recovery)
- Username/Password: NOT “admin” – pick something secure
- Database Password: It will automatically create a database name and you can set a password for it.
- Choose your language (English or whatever suits you)
- Choose your server location based on the country of your target audience.
- Click Install
Done. Your site will be live in a minute or two.
Access your WordPress dashboard at:
https://yourdomain.com/wp-adminUse the login you just created.
Also Read: 10 Essential WordPress Settings You Must Configure for a Smooth Start
What to Do Next
Here’s what you need to do right after WordPress is installed:
- Pick a clean theme (I love Kadence, Astra and GeneratePress)
- Install basic plugins:
- Rank Math SEO (for search rankings)
- LiteSpeed Cache (you’ll get this by default, don’t delete this)
- WPForms (for contact forms)
- Site Kit by Google (for analytics)
- Classic Editor (by default you’ll get Block Editor aka Gutenberg but its a little hard to use so I suggest you to use Classic Editor if you’re not familiar with block editor)
- Go to Settings > Permalinks and select Post name and save it.
- Set up your about and contact pages
- Delete the sample post/page/comment
- Start writing your first blog post
Yes, customizing your blog is fun. But don’t get stuck adjusting colors for 3 weeks. Keep it simple. Publish first, polish later.
Final Thoughts: Keep It Simple
Buying domain and hosting for WordPress isn’t nearly as complicated as it sounds.
Once you’ve got:
✅ A clean domain
✅ Reliable hosting
✅ WordPress installed
You’re ready to blog like a boss.
Don’t wait for perfect. Don’t wait for “someday.”
Buy a domain and hosting today, make it live, and write your first post by tomorrow.
That’s how blogs are born.
Are you Ready to Start? Get your domain + hosting on Hostinger and have your blog live in under 30 minutes.
FAQs about buy a domain and hosting
Can I buy a domain and hosting separately?
Yes, you can. Some people prefer buying a domain from platforms like Namecheap or GoDaddy, and hosting from another provider. However, if you’re just starting out, it’s easier to get both from the same company to avoid technical setup like DNS configuration.
What makes a good domain name?
A good domain name is short and easy to remember, free from numbers or hyphens, relevant to your blog or brand, easy to spell and pronounce.
Is hosting a one-time purchase?
No, hosting is typically a recurring subscription, billed monthly or annually. Most providers offer discounts for the first year, but be sure to check the renewal pricing so you’re not surprised later. Domain names also need to be renewed yearly.
Do I need technical skills to install WordPress?
Not at all. Most hosting platforms in 2025 (like Hostinger) offer one-click WordPress installation. You just choose a plan, fill in your site name and login details, click install — and you’re done. No coding or complex setup needed.
Can I change my domain name later?
Technically, yes — but it’s not recommended unless absolutely necessary. Changing a domain name later can impact your SEO, backlinks, and brand identity. It’s better to take your time choosing a domain that you’re happy to stick with long-term. If you must change it, you’ll need to set up proper 301 redirects.
What’s the difference between shared hosting, VPS, and cloud hosting?
Shared Hosting: Best for beginners and small blogs. It’s affordable and beginner-friendly, but resources are shared with other websites.
VPS Hosting: Offers more control and better performance. Ideal for growing blogs or websites with more traffic.
Cloud Hosting: Scalable and highly reliable. Great if you expect spikes in traffic or want better uptime.
Can I change or upgrade my hosting plan later?
Yes, absolutely. Most hosting providers — like Hostinger, Bluehost, or SiteGround — allow you to upgrade your plan anytime. If your blog starts getting more traffic or you need better performance, you can easily switch from a basic shared hosting plan to a higher-tier plan like VPS or cloud hosting. No need to migrate manually — most hosts handle the upgrade process for you.